The manual of orbis-reframe 0.10.1, the newest release. What has changed since is in the development version on GitHub.
Projects and export
This page covers saving your work as a project, the project's output settings, exporting the finished video, and saving single frames as pictures.
Projects
A project holds your whole edit: the clips and their order, trims and speeds, reframe keyframes and split screens, the stabilization, stitching, colour, audio and privacy settings, the audio and overlay tracks, the project's media (the Media tab, see The main window), and the output settings.
The project library
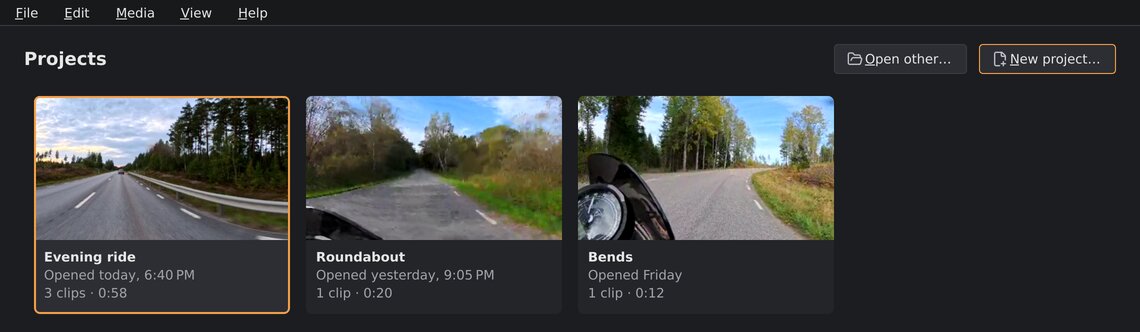
When orbis-reframe starts without a file to open, it shows the project library: every project as a card with a picture from its first clip, its name, when it was last opened, and how many clips it has and how long it is. A card says so in red when the project's file is gone, can't be read, or some of its media files are missing.
| To | Do |
|---|---|
| Open a project | Double-click its card, or select it and press Enter. |
| Start a new project | New project… (Ctrl+N). |
| Open a project file that isn't listed | Open other… (Ctrl+O). |
| Rename a project | Right-click its card ▸ Rename…, or select it and press F2. Both the project's folder and its project file get the new name. |
| Copy a project | Right-click its card ▸ Duplicate… and give the copy a name (<name> copy is suggested). The copy gets its own folder beside the original, with the project file, its cache/ (privacy-blur scans and waveforms) and its luts/, but not its exports or screenshots. The media files aren't copied: both projects use the same clips. |
| See a project's files | Right-click its card ▸ Show in file manager. |
| Take a project off the list | Right-click its card ▸ Remove from list, or select it and press Delete. Its files are not deleted. |
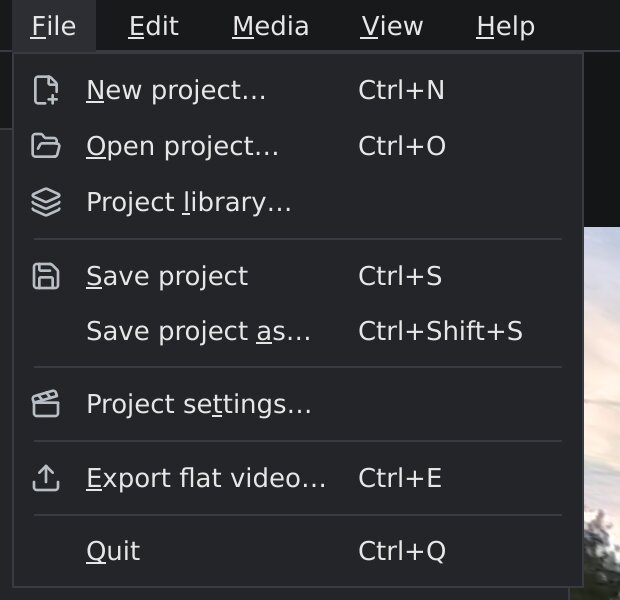
| Come back to the library | File ▸ Project library…. It closes the open project, asking first if there are unsaved changes. |
The library lists the projects you've opened or saved, and every project
folder in the projects folder, ~/Videos/orbis-reframe unless you pick
another with Change… at the bottom of the library. New projects go
there by default.
One folder per project
File ▸ New project… (Ctrl+N) asks for the project's name, its
location (the projects folder unless you browse to another) and the
output: aspect ratio, resolution, frame rate and bit depth (see
Project settings; you can change them later in
File ▸ Project settings…). It
then makes a folder for the project and saves the new, empty project in it:
Summer trip/
  Summer trip.orp   the project file
  cache/            privacy-blur scans, audio waveforms, media thumbnails
  exports/          where exports are saved by default
  screenshots/      where screenshots are saved by default
  luts/             the clips' colour LUTs, copied in when loaded (see Colour)
Deleting the folder deletes the whole project, scans included. The video and audio files you add stay where they are (see Where the clips are).
| To | Do |
|---|---|
| Save the project | File ▸ Save project (Ctrl+S). |
| Save a copy in a new project folder | File ▸ Save project as… (Ctrl+Shift+S): give the copy a name and location. From then on, Ctrl+S saves to the copy. Its privacy-blur scans and the clips' LUTs are copied along. |
| Open a project file from anywhere | File ▸ Open project… (Ctrl+O), or give the .orp file on the command line: orbis-reframe my-ride.orp. |
The window's title shows the project's file name, with a * while there
are unsaved changes. When you close orbis-reframe, open another project or
go back to the library with unsaved changes, it asks whether to save them.
Autosave. While there are unsaved changes, orbis-reframe writes them
every two minutes to a recovery file next to the project file
(<name>.orp.autosave). Your project file only changes when you save. The
recovery file is deleted again when you save, or when you choose
Discard on closing. If orbis-reframe stops without closing properly (a
crash, a power cut), the next time you open the project it offers the
changes: Recover opens the project as it was at the last autosave, with
the changes unsaved (save them to keep them); Discard changes opens it
as it was last saved and deletes the recovery file. An untitled project
(below) isn't autosaved until it's saved once.
Projects from before project folders (a .orp file on its own, made
with version 0.2.0 or older) still open with Open project… and save
where they are. Their scans, waveforms and thumbnails stay in ~/.cache/orbis-reframe/.
Save project as… puts such a project into a folder of its own.
A clip opened on the command line (orbis-reframe clip.insv) starts an
untitled project. Save project asks for a name and location and makes
its folder.
Where the clips are
A project doesn't contain the video and audio files: it remembers where they are. Your original files are never changed.
- Keep the files where they are. If a file is moved or renamed after you added it, the project can't find it. When you open the project, it says Missing media and lists each missing file with where the timeline uses it (clip 2, inset on “Overlay 1”, sound on “Music”) and its full path. The clip can't play: it shows black for its length, with Can't play …: the file is missing beside the edit buttons, and playback goes on to the next clip. Sound from it is silent, and an export refuses to start until the file is found (When the export won't start). The project's card in the library says how many files are missing. Either put the file back where it was (with its old name), or show the project where it is now: in the Media tab the file is red, File not found; double-click it (or right-click it ▸ Locate file…) and pick the file. It has to be the same file, the same kind and length; another file is refused. Every clip cut from it plays again, and other missing files with their names in the same folder are found with it, so a folder that moved as a whole takes one pick. Edit ▸ Undo takes it back. A clip's number-plate scan (Privacy blur) comes along when the file was moved; after a copy it may not, and then the clip needs Scan clip again before it can be exported with the blur.
- Files that go away while the project is open -- a USB drive or memory card unplugged, a file moved or renamed in the file manager -- are noticed within a couple of seconds, and as soon as you come back to orbis-reframe from another window. Their clips turn red with a ⚠ on the timeline, the Media tab says File not found, overlays and sound from them stop, and the line above the timeline names the files. Put them back (plug the drive in again) and they're found again by themselves, the same way: the line says Found again, and the clips play again. Nothing in the project changes, so this is nothing to save or undo.
- A file that can't be read (a broken or half-finished copy) plays black. Copy the good file over it, under the same name, and it's picked up the same way, within a couple of seconds: the clip plays again and its Media card gets its picture and recording mode, without reopening the project.
- A clip in two files (the Insta360 ONE X2 writes each lens of a 5.7K
clip to its own file,
VID_…_00_…andVID_…_10_…) needs both, in the same folder. The project remembers both; if either is gone, the clip is missing, and the messages name the file that is. Moved together, one Locate file… on the clip finds both. - A recording split over several files (the X5 starts a new file every 29 min 59 s; see Timeline) is one clip, and the project remembers every file of it. If one of the later files is gone, the rest of the clip still plays: the part that's gone is black and silent, and red on the timeline with a ⚠ on the clip (hover over it for the file's name); the messages and the Media information section name its file, and an export refuses to start while the clip uses that part. There is no Locate file… for such a file: put it back in the folder with the others, under its own name, and it's found again by itself. A file that was already missing when you added the recording (a middle one: the files around it show the gap) plays black the same way, named as a file of its recording that isn't there. Opened from a later file when the first isn't in the folder, the clip starts at the file you opened; Media information names the first file.
- To move a project with its clips, put the clips inside the project's
folder, for example in a
mediafolder next to the.orpfile. orbis-reframe then stores their places relative to the project, so you can move or copy the whole folder, for example to another disk or computer, and the project still finds everything.
Measurements orbis-reframe makes for each clip (gyro sync and seam
alignment) are saved in the project file, and privacy-blur scans in the
project's cache/ folder. A measurement is written into the project file as
soon as it's done, without saving anything else: it doesn't count as an
unsaved change, and your unsaved edits stay unsaved.
Project settings
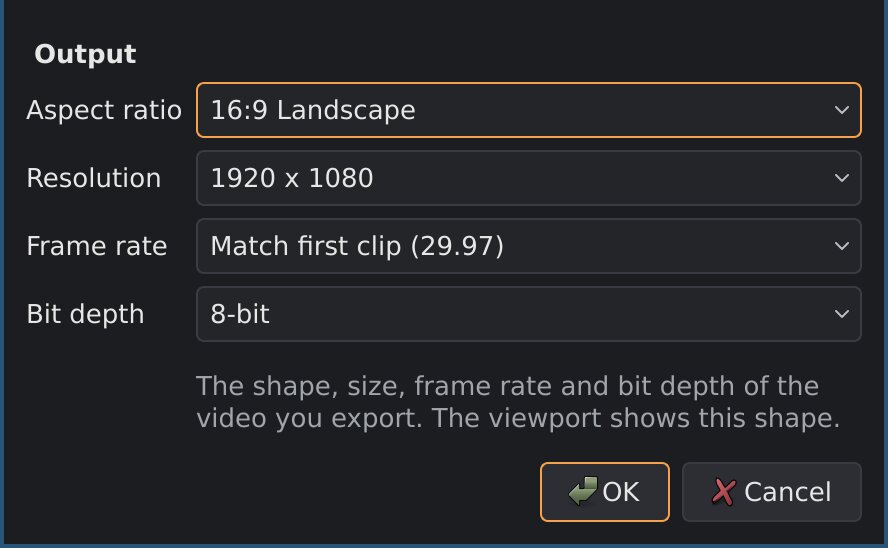
File ▸ Project settings… sets the shape, size, frame rate and bit depth of the video you make. A new project gets them from File ▸ New project…; this is where you change them later. Click OK to apply your changes, or Cancel to leave them as they were. Edit ▸ Undo takes a change back.
| Setting | What it does |
|---|---|
| Aspect ratio | The shape of the picture: 16:9 Landscape (YouTube, TV), 9:16 Vertical (phone, Shorts, Reels, TikTok), 1:1 Square, or 4:3. The viewport takes this shape at once, so you see exactly what will be exported. |
| Resolution | The export's size. Each aspect ratio has four sizes, from 720p to 4K (2160p): for 16:9, 1280 × 720, 1920 × 1080, 2560 × 1440 and 3840 × 2160. The export can still pick another size. |
| Frame rate | The export's frames per second. Match first clip uses the frame rate of the first clip on the video track. Or pick 23.976, 24, 25, 29.97, 30, 50, 59.94 or 60. |
| Bit depth | 8-bit (the default) plays everywhere. 10-bit keeps finer steps between shades; it needs H.265 (see below). |
Changing the aspect ratio keeps your reframe keyframes: the camera still looks in the same directions, only the picture is cut to another shape. Check your framing afterwards, especially when changing between landscape and vertical.
8-bit or 10-bit. A 10-bit export stores four times as many shades per colour as an 8-bit one, as H.265 "Main 10". It's worth it for clips recorded in 10-bit (the X6's I-Log and Dolby Vision modes), above all for log footage you export without a LUT to grade in another program: there, 8 bits show as bands in skies and smooth walls. For a video you upload or watch as it is, 8-bit looks the same and plays on more devices; older phones, TVs and some editing programs can't play 10-bit. It's still a normal (SDR, Rec.709) video, not HDR.
Frame rate and clips. Each clip is played at the project's frame rate. A clip filmed at a higher rate has frames left out, and one filmed at a lower rate has frames shown twice; frames aren't blended. Slow motion uses this: a 120 fps clip at 0.25× speed in a 30 fps project shows every frame it recorded (see The timeline).
Exporting the video
File ▸ Export flat video… (Ctrl+E) turns the whole timeline into a
normal, flat MP4 video that plays anywhere.
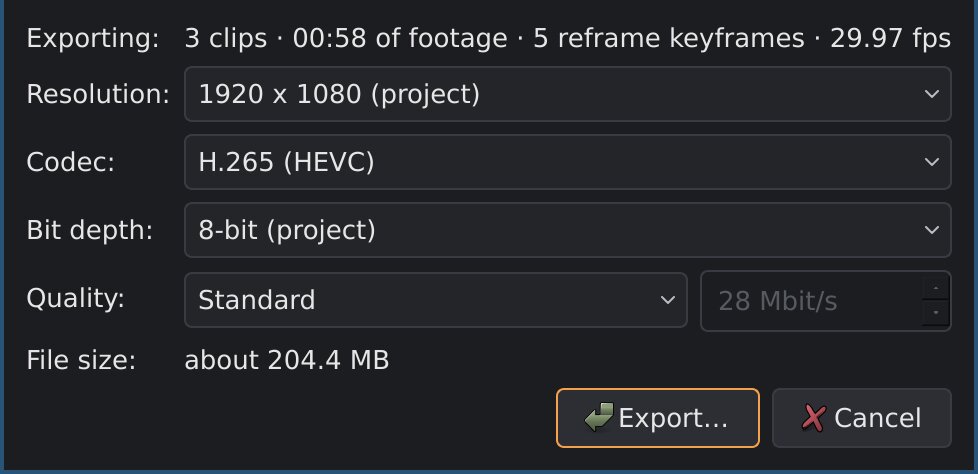
Choose File ▸ Export flat video….
The dialog sums up what will be exported: how many clips, how long, how many reframe keyframes, and the frame rate.
Pick the Resolution: the project's size is selected; the others have the same aspect ratio.
Pick the Codec:
- H.265 (HEVC): smaller files at the same quality. Plays on current phones, computers and TVs, and YouTube accepts it.
- H.264: plays on almost everything, including older devices and some editing programs that don't take H.265. Files are larger.
Pick the Bit depth: the project's is selected (see 8-bit or 10-bit). 10-bit needs H.265; with H.264 the export is 8-bit.
Pick the Quality:
- Standard: enough for uploading and further editing.
- Smaller file: half Standard's bitrate, for sharing when size matters. Busy scenes, like trees and gravel rushing by, can look soft.
- High: twice Standard's bitrate, for footage you'll edit or re-encode again.
- Custom: type the bitrate in Mbit/s (1 to 300).
The box next to it shows the bitrate in Mbit/s, and File size the approximate size of the finished file. Your choice is remembered for the next export.
Click Export… and choose where to save the file. It's suggested in the project's
exports/folder, named after the project.A progress window shows how far the export has come. Cancel stops it and deletes the unfinished file.
When it's done, orbis-reframe says where it wrote the file. For a 10-bit export it also says if something kept it from being fully 10-bit: when the graphics card's encoder can't write 10-bit H.265, the file is 8-bit instead; and a clip that can't use the GPU stitch (when the graphics card can't decode it, for example) is exported with 8-bit precision inside the 10-bit file, named in the message. It also names the clips the graphics card couldn't decode or stitch, most often because its memory was full: they were done on the processor, which gives the same picture but takes much longer (see If it doesn't start).
What goes into the export
Everything you see and hear in playback: every clip on the video track with its trims, speed, reframe keyframes, split screen, stabilization, colour and privacy blur; the overlays; and the sound of the clips and the audio tracks, with their levels, fades and noise reduction. Muted tracks and clips stay silent, and hidden overlay tracks are left out.
The export runs from the start of the first clip on the video track to the end of the last one. There's no way to export only part of the timeline yet: to export a part, save the project under another name and trim it.
The quality levels' bitrates depend on the resolution, frame rate and codec. Standard is 40 Mbit/s for 1080p at 30 fps in H.264, about 120 Mbit/s at 4K; 60 fps gets about one and a half times as much, and H.265 30 % less, because it needs fewer bits for the same picture. The sound is AAC, stereo, at 48 kHz and 192 kbit/s; when nothing on the timeline has sound, the file has no sound track at all.
When the export won't start
| Message | What to do |
|---|---|
| Exporting needs a hardware video encoder (NVIDIA NVENC, Vulkan video or VAAPI) | Export uses the graphics card to encode. On NVIDIA, install libnvidia-encode1 (Getting started, step 2). On AMD and Intel, install the VA-API driver (Getting started) and check with vainfo that it lists encoding (VAEntrypointEncSlice). Show Details… says why each encoder couldn't be used; if you report the problem, include it. |
| The timeline can't be exported: these source files are missing. | A clip's file isn't where the project expects it -- on the video track, an overlay or an audio track (the list says which). Put it back, find it with Locate file… in the Media tab (see Where the clips are), or remove its clips from the timeline, then export again. A missing file of a recording the camera split over several files goes back in the folder with the others instead, or trim or split the clip so the timeline leaves that part out. Clips on hidden or muted tracks, and muted audio clips, don't count: they aren't exported anyway. |
| "…" has the privacy blur on, but it hasn't been scanned for plates yet (or only part of it has been scanned) | Scan that clip in the Privacy tab, or turn its blur off. See Privacy blur. |
| The privacy blur may be out of date and needs checking or redoing. | The stabilization was changed after the plates were found. Continue anyway, or check the blurs first. See Privacy blur. |
| The timeline is too short to export. | The timeline is shorter than a tenth of a second. |
Look at the summary. If it says no keyframes — static forward view, none of your clips has a reframe keyframe, and the whole video looks straight ahead from the camera. If only some clips have keyframes, the dialog lists the others under Not reframed, by number, name and where they start on the timeline. See Reframing.
Screenshots
The camera button in the player bar under the viewport, or
Ctrl+Shift+P, saves the frame at the playhead as a PNG picture, at the
project's resolution, with the same quality as the export: the viewport's
current view, with stabilization, colour, privacy blur and overlays.
The suggested file name is the project's name and the playhead's time, in
the project's screenshots/ folder (in the project file's folder for a
project from before project folders, and in your Pictures folder for an
untitled one). The edit toolbar above the timeline says when the picture is saved.